Lemon Almond Meringue Cookies: Perfect Pre-Wedding *Bridesmaid* Snack

Image

I’m officially getting excited. Almost there. I’m heading back home TONIGHT to beautiful Vancity for my sister’s wedding! I can hardly wait although I’m sure it will be waterworks and emo-ness throughout especially since it will be open bar. I love weddings. Open-bar weddings =)

Aside from all the family gatherings, I just can’t wait to see my friends and explore around with my guy. Let’s call him P. I will be sure to stuff my face with all the lovely fresh seafood and I’m especially excited about the freshly shucked oysters in Yaletown. Also, P will be attempting to teach me better my driving skills. 11 times for the written test and begging (literally) to pass my driving test, amazing I was given a driver’s license. After multiple of incidents, I’m hesitant to drive and I’ve forgotten really how! Maybe I was never too sure how…lol. But it’s either that or ride a bike. And no one wants helmet hair right?

Back to point is….I’ve been aging my left-over egg whites for now 24 hours and they should be at the perfect stage to whip lovely peaks. I’ve decided on a lighter snack since there will be much feasting in the coming weeks and I’ve altered my bridesmaid dress to be a bit snug. Thanks for not judging -.-”

Image

With a couple of fresh lemons and plenty of almonds in stock, I’m opting to go for a Lemon Almond Meringue Cookie. Meringue is an interesting word: I would like to dedicate this to my dear friend JG. I’m sure you know why =) hehe

As I started this blog, my goal was really to try to go back to things that I’m passionate about and I’ve always wanted to become a more curious person (since that’s really how you will learn things and develop hobbies!) as well as to be more patient. Really. What better than meringue?

Image

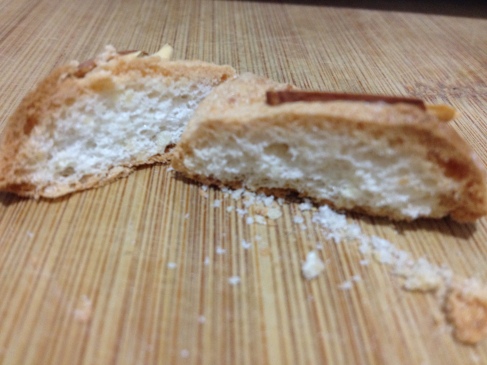
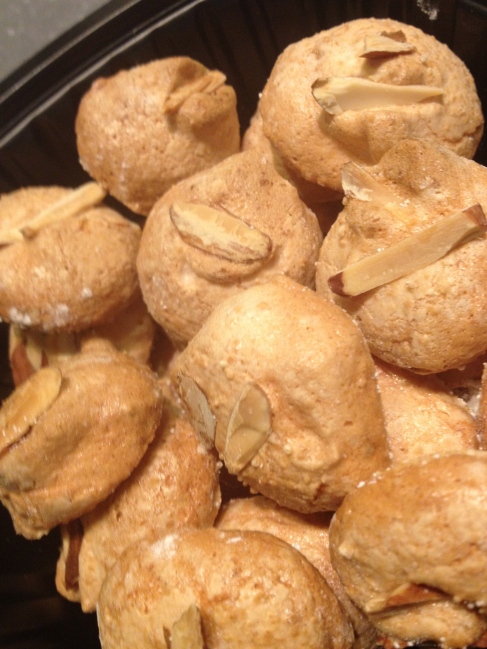
These almond-infused goodies have amazing chewy texture with a slight crunch from the nuts. Melt-in-mouth factor is HIGH. I seriously just ate 6 of these fresh from the oven!!! Only reason I stopped is to wait for the next batch’s…emm…taste test =) Hoping my nieces will enjoy these too!! THEY ARE VERY PICKY EATERS. Oddly enough, both of my nieces do NOT like anything too sweet! Their favorite dessert is fruit. And my older niece would pick cheese and olives over ice-cream any day! Talk about sophisticated taste…hopefully they will like these cookies!!

First. My curiosity on the following dilemma:

Separated egg whites vs egg whites substitute:
For any recipe calling for only egg whites, I’m always hesitant since I’d hate to waste the egg yolk and I personally don’t feel comfortable keeping them in the fridge for too long either. Most commonly, I just add an extra yolk to my omelette or reserve it to brush my dinner roles/ pie crusts for that golden-yellow glow. Not sure if I’m the only one but I’ve always wondered whether I can use egg white substitutes like egg beaters to do the job. BUT apparently, there’s extra nutrients added and some substitutes even have xanthan gum and flavoring added. The main reason really is that he is generally pasteurized (i.e. heating close to the temperature at which whites being to coagulate/cook) which prevents them from developing a stable and stiff meringue. Verdict? Go with naturally separated egg whites and keep them in room temperature for an hour prior to whipping as you get better results since warmer eggs whip faster than cold eggs.

Image

Working on my patience?

You may find recommendations on aging the whites longer but for convenience sake I’ve always just took them out of the fridge in room temperature an hour prior to whipping. But given I’ve been having more time lately and really trying to be an overall more patient person…I did go with aging them for 24 hours and the results are AMAZING! As lazy as I am, I’d have to say I would definitely be patience, age em’ whites and have better results =)

To achieve the best results for your egg whites:

  1. Age them in room temperature for 24 hours minimum
  2. Make sure your whisk and bowl are spotlessly clean and dry as any residue (or grease) will kill egg whites
  3. Make sure during separation process to not get any egg yolk into the egg white mixture as this also causes deflation of the egg whites
  4. Use natural eggs separated versus egg substitutes

Image

Lemon Almond Meringues (adapted from: www.joythebaker.com)
Recipe makes around 2 dozen small meringues (I made x3 of the recipe below since they go FAST!!)

Ingredients:

  • 1/4 cup finely ground almonds (I just used almond flour for convenience)
  • 1 tablespoon cornstarch
  • 2 large egg whites
  • pinch of salt
  • 1/2 cup granulated sugar
  • 1/2 teaspoon lemon juice
  • 1 teaspoon lemon zest
  • 1/3 cup sliced almonds
  • 1/3 cup powdered sugar

Directions:

  1. Preheat oven to 200 degrees F (around 93 degrees C). Line two baking sheets with parchment paper and set aside.
  2. Use a food processor to finely grind almonds (or in my case, I used almond flour or you can simply just chop very finely your whole almonds as only different would be crunchier texture of the cookie). Place them on one of the lined baking sheets and toast in the oven for 10 minutes. Remove from oven and place in small bowl, toss in cornstarch and set aside to cool.
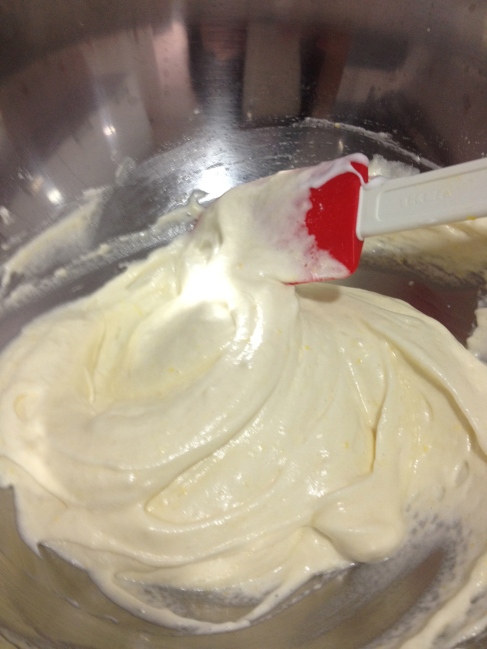
  3. In another small bowl, beat egg whites (must use electric mixer) and a pinch of salt on medium speed. Beat until frothy peaks form. Then increase mixer speed to medium high and gradually add in the sugar. Then follow with the lemon juice. Beat until mixture is glossy and white and holds stiff peaks (i.e around 5 – 7 minutes)
  4. Add in ground almond mixture and lemon zest. Gently fold together until mixture is thoroughly incorporated.
  5. Transfer meringue. Several options: 1. Transfer meringue into a large pastry bag fitted with a star tip (super cute!), 2. Simply use a large spoon to dollop meringue onto lined baking sheet, 3. Transfer into a large resealable (ziplock) bag and cut a tip and use as if pastry bag. Create 2 inch circles using any of the above methods. Note: you don’t have to space them apart much since they won’t spread during baking process!I
  6. Generously sift powdered sugar on top of the meringues. Top with silvered almonds.
  7. Place sheet trays in the oven and bake for 50 minutes. Then turn off oven, open the door a crack, and leave meringues in the oven until they’re completely dry. When cool, remove meringues from the baking sheet and enjoy! Cookies can be stored in an airtight container for up to 1 week.
Image

Savoiardi: fingers has never tasted this good….

Image

So the quest for Italian cookies continue! I love anything flavorful yet healthy and these savoiardi cookies hit just the right spot! These yummy biscuits are know typically in America as lady fingers and most commonly used for tiramisu recipes although I think these freshly baked homemade biscuits are absolutely good to go!

This is a delicious simple recipe with ingredients that you probably already have in your pantry. I whipped this up in literally 10 – 15 minutes and I can already smell the warm sweetness of the biscuit in the kitchen!

Image

As there’s limited space for a convention oven and most of us here in Hong Kong are equipped with the next choice, aka a toaster oven, I found that this recipe works perfectly fine. Some adjustments to note is that heat may be distributed less evenly and I found that with my oven, the back burned faster so I rotated 5 – 7 minutes into baking. Always a good thing to continue to monitor your first batch to see which heat and time works best with your particular oven! Another caution to take is that these smaller ovens will induce heat closer to the cookies and will cause higher tendencies the burn so I bake them until they harden and put a layer of aluminum foil on top to avoid burning the tops of these delicate cookies (Thanks mom!).

Image

SAVOIARDI RECIPE (source: www.allrecipes.com)

This recipe makes 24 cookies
Note: This simple recipe is tested fool-proof! I whipped the egg yolk only somewhat consistently and egg whites sometimes with softer peaks, sometimes stiffer peaks and result is still a soft spongecake biscuit!

Ingredients:

  • 4 eggs
  • 2/3 cup white sugar
  • 1 teaspoon vanilla extract
  • 1/8 teaspoon salt
  • 3/4 cup all-purpose flour

Directions:

  • Preheat oven to 375 F (190 C). Line three jelly roll pans (or any flat baking pan) with parchment paper. Prepare a pastry bag with a size 6 (1/2 inch tip). Note: I’m more of an economical baker so I always substitute with a large ziplock bag with a 1/2 inch tip cut!
  • Separate the eggs. Whisk the egg yolks with 1/2 of the sugar and all of the vanilla. Beat until very light colored (Can use mixer for a couple minutes or by hand for around 5 minutes- I got a good workout from this!)
  • In a clean bowl beat the egg whites until they hold soft peaks. While beating, slowly add the salt and the remaining sugar until combined. Gently fold the beaten egg whites into the egg yolk mixture.
  • Sift the flour over the egg mixture and gently fold it in.
  • Fill the pastry bag with half of the batter and pipe 3 1/2 inch fingers, 1 1/2 inches apart, in rows on the parchment paper. Continue with the second half of the batter in the same manner. Note: Feel free to sift powder/icing sugar on top of these prior to baking for an added touch of sweetness!
  • Bake for around 15 minutes until firm to touch and golden. Remove fingers from baking sheet and place on racks to cool.

After cooling, there’s 2 choices: EAT ALL IMMEDIATELY or store these lovely fingers in an airtight container between layers of wax paper. They also freeze well.

Hello….meet Biscotti. Butterless goodness. Need I say more?

Image

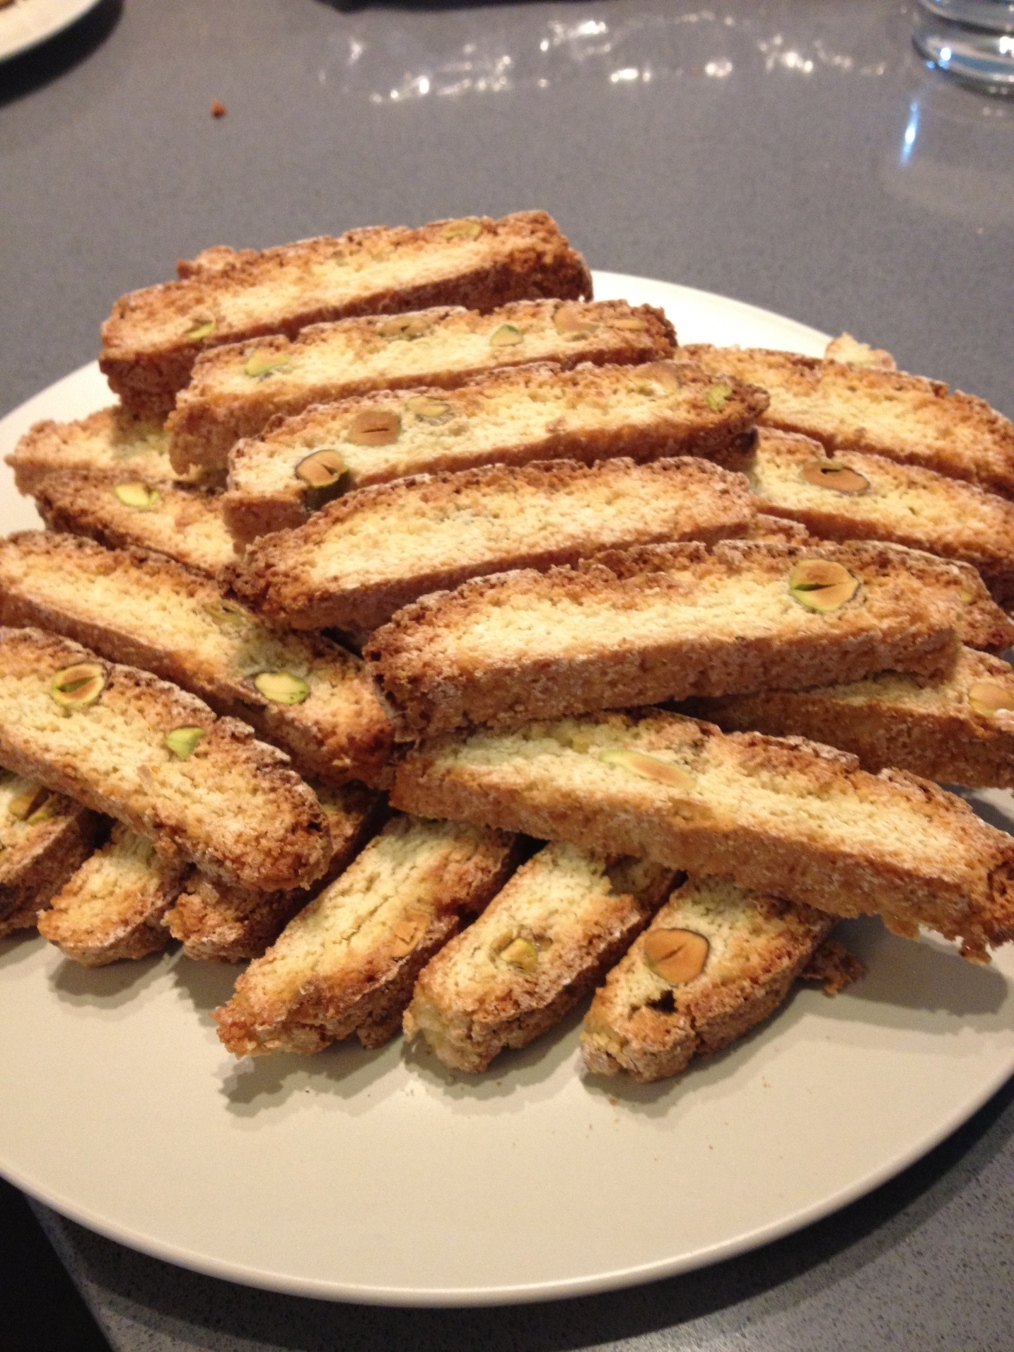
Whenever I think cookies, I think only of buttery goodness and sweet sweet sugar. It always seemed more of a treat and guilty pleasure than a healthy snack. After a bit of research, I stumbled across the biscotti and it was the perfect platform to dip my feet in baking in Hong Kong. I’m insanely addicted to all things nuts (ahem*) and the sweetness of fruits with the crunchy texture of nuts is just a match made in heaven! I’m by no means an advanced baker so I like recipes that are simple and fool-proof to follow. For my first batch, I opted with a Lemon Pistachio Biscotti recipe (source: http://www.best-cookie-collection.com).

I love how this cookie has so much texture and taste from the double-baking. A plus that there is no butter or extra fats except the eggs and for fans of a big crunch, you just need to bake it slightly longer and for fans of a chewier texture, you simply need to add a bit of butter to the recipe. The amount of sugar can be adjusted to your taste (I like more sugar with a plain biscotti or less if I intend on making a icing drizzle- recipe at the bottom of page).

Image

You can really play with this recipe and use any nuts you adore (almonds, hazelnuts…), fruit combinations (apricots…), add in your favorite drinks (expresso, matcha) AND for the alcoholic in some of us, twist it up for an adults version (my current love is with limoncello!). It’s a simple recipe and hard to go wrong and works perfectly baked in a toaster oven.

Lovely dipped in coffee or liqueur of your choice, biscotti’s’ are excellent and healthy choice for AM or PM!

ENJOY!

LEMON PISTACHIO BISCOTTI RECIPE

Recipe yields around 48 biscottis and they last for 1 – 2 weeks in an airtight sealed container.

Ingredients:

– 2 1/4 cups flour
– 1 cup sugar
– 2 teaspoon finely grated lemon zest
– 1 1/2 teaspoons baking powder
– 1 1/2 teaspoons salt
– 1 cup unsalted pistachio nuts un-chopped (can substitute with any nut of your choice! Just make sure it is unsalted)
– 2 large eggs
– 1 egg yolk from large egg
– 1 tablespoon lemon juice (can opt for limoncello for the adult version. I prefer to add a shot and don’t worry it won’t be very strong!)
– 1 teaspoon vanilla (can substitute with almond extract)

Directions:

  1. Preheat oven to 325 degrees F (i.e around 162 degrees C). Line a baking sheet with parchment paper or nonstick baking liner.
  2. In a large bowl combine (either mixer or by hand) flour, sugar, lemon zest, baking powder and salt until well blended.
  3. Add the nuts (slow speed on mixer or by hand).
  4. In a small bowl, lightly beat the eggs, egg yolk, lemon juice, and vanilla with a whisk.
  5. Slowly pour in egg mixture to the flour mixture (slow speed on mixer or by hand).
  6. Continue stirring until the dough is well blended and begins to form moist clumps (takes around 2 minutes).
  7. Scrape the dough onto an un-floured clean surface. Lightly dust your hands with flour and knead the dough briefly. Shape the dough into 2 equal sections.
  8. Shape each section into a 2 inch by 10 inch log. Beware that the dough will be sticky so you may need to add more flour to your hands as you go.
  9. Transfer the logs onto your prepared baking sheet, spacing them a couple inches apart.
  10. Bake for around 40 minutes or until the top of the logs are cracked and the dough inside the cracks no longer look wet.
  11. Take out of oven and place baking sheet to cool for around 15 minutes.
  12. Using a serrated knife, cut the logs on a slight diagonal into 1/2 inch slices. Use a gentle sawing motion to cut through the top crust.
  13. Place the slices back onto the baking sheet cut side down and this time no need to space the since they will no longer spread.
  14. Bake the biscotti again at same heat for another 10 – 20 minutes or until they are dried to your taste. Less if you want more chewy and more if you like the big crunch.
  15. Place baking sheet to cool.

Image

SIMPLE LEMON ICING

Ingredients:
– 2 cups sifted powdered sugar
– 1 teaspoon grated lemon zest
– 1/4 cup lemon juice (or you can spike it again by replacing with limoncello!)

To make the icing, simply combine all the above ingredients in a small bowl and beat until smooth. You can drizzle over the biscotti or dip one end of it or coat the flat bottom of the cookie and let dry. For this simple icing, feel free to change it up with other flavors, like using orange zest or other juices/ liqueurs to your liking!

Experimenting with this versatile recipe is the best part! Ahhh….loving simplistic recipes!