Let’s Celebrate (Left-over) Egg-Yolks! : Egg-Yolk Spongecake/ Cupcakes

Image

Ahh…love Saturday mornings! The one day where it really feels like the true weekend….Fridays’ are pretty amazing but Saturdays’ are when you get the FULL day to the max and Sunday mornings are slightly dreadful since Monday blues comes next! BUT since I’ve recently decided to take a career break, I’m loving and enjoying each and every single day…yes, even you oh-so-blue Monday =)

Image

So, my initial plan was to make some angel food cupcakes but since I wanted to make sure I get the most out of my egg whites, I decided to be a bit patient (somewhat) and separate them ahead of time and age them overnight. Most people suggest room temperature BUT I’m still a bit skeptical so I’m still putting them in the fridge and will only take them out to room temperature an hour prior to some serious whipping action.

Image

Which leaves me with an abundance of egg yolks and 6 to be precise. Long story (not really) short, I decided to make an egg-yolk sponge cake (more like cupcakes) to bring with me for my dear friend’s housewarming this afternoon.

Image

I’m still loving the perks of baking: eating all the “failed” cupcakes and taste testing =) I know my other half sure is enjoying all these morning treats!

Image

Egg Yolk Sponge Cake (adapted from: www.nigella.com)
Recipe makes around 20 – 30 cupcakes or 2 very thin 8” sponge cake

Ingredients:

  • 6 egg yolks
  • 4 tablespoons hot water (not boiling)
  • 1/2 cup granulated sugar
  • 1 cup sifted self raising flour (if you only have all-purpose flour like I did this morning, you can substitute with 1 cup sifted all-purpose flour plus 1 teaspoon baking powder and 1/2 teaspoon salt)
  • 1 teaspoon vanilla extract (I opted for 1/2 teaspoon vanilla and 1/2 teaspoon almond extract)
  • 4 tablespoons milk (can use non-fat or low-fat milk!)

Directions:

  1. Preheat over to 170 degrees C (i.e. around 356 degrees F).
  2. Beat egg yolks and hot water until creamy then gradually add the sugar and eat until thick and pale (can beat by hand or electric mixer). Add vanilla extract.
  3. Fold in the sifted flour and milk until combined. Pour into a greased and lined tin or cupcake liners. Note:these cakes rise quite a bit! So fill only half full otherwise it will rise and topple over! That’s what happened to my first batch unfortunately…
  4. Original directions asked to bake for 20 – 30 minutes but I found that 15 – 20 minutes is sufficient. Then take out and do the toothpick test to see if it comes out clean and cool oh wire rack.
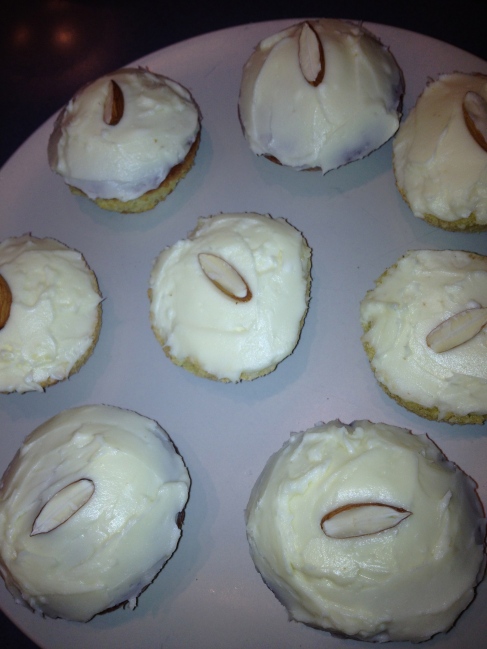
  5. Last step you have several options: 1) Eat as is freshly out of the oven! 2) Frost it with cream cheese frosting (healthy recipe below!) and/or sprinkle with some colored sugar or anything else you fancy! 3) If baking a big cake, you can cut the cake in half then fill it with jam and whipped cream and then dust with some icing sugar. Be creative!

Image

ADDITION: Just noted that the cream cheese frosting used for the cupcakes wasn’t posted with the original post so here you go!

Low Fat Cream Cheese Frosting (www.skinnytaste.com)

Ingredients:
– 8 oz low-fat (or can use full-fat!) cream cheese
– 1 cup powdered sugar
– 1 teaspoon vanilla extract
Directions: Only one step! Simply beat together all ingredients until smooth!

Muffins: Cupcake’s angelic twin

I love cupcakes but have always found them a tad too sweet and a bit of a guilty pleasure!  SO, that being said, I decided to opt for a yummy muffin alternative since it’s really a less-sweet cupcake with no frosting. With extra cranberries and almond in hand, I’m setting out to do some Friday night baking with the aim on another butter-free recipe, because hey, just because you like muffins, doesn’t mean you need to get a muffin top.

Why cranberries? Well aside from being conveniently already there in my pantry…..cranberries have amazing health benefits with antioxidants and studies showing their benefits in reducing cholesterol and preventing certain diseases.

At first, I was thinking that all the different mix of flours in this recipe would be less convenient than I would generally prefer so after a bit of research, I realize that you can easily substitute the whole wheat flour with normal all-purpose flour. But, for this recipe, I actually ended up getting myself a bag of whole wheat flour since it creates more gluten, it will result in a more chewy texture. Generally, it is better for breads than cakes or pastries but since this recipe is sans butter, I decided that the extra UMPH of chewiness might do it justice!

Also, since I was out of baking soda, I did yet another mini research into the soda vs powder dilemma.  So in a nutshell, if you come across a recipe that calls for baking soda and all you have is baking powder, you can easily substitute it by increasing the quantity since both really are just leavening agents. BUT for recipes that call for baking powder, the same cannot but done with baking soda as by itself it lacks the acidic nature to make a cake rise whereas baking powder already contains an acid and a base so it works well with any acidic or non-acidic ingredient. Baking soda also has a slight bitter taste which is generally countered by adding an acidic ingredient (e.g. yogurt, chocolate, buttermilk, honey) whereas baking powder has a neutral flavor. So for convenience sake as again, I’m a fan of economic and simple baking, simply mix two parts cream of tartar with one part baking soda and there you have it! Your homemade baking powder =)

Hope you’ll enjoy these moist babies as much as I do! GUILT-FREE

Cranberry-Orange Almond Muffin (source: www.wholeliving.com)
Recipe makes 16 muffins (BUT for me this recipe came out with 24 muffins!)

Ingredients:

  • 1 1/4 cups sugar
  • 1 cup whole wheat flour (Optional as can go with just all-purpose flour)
  • 3/4 cup all-purpose flour
  • 1/4 cup almond flour
  • 1 teaspoon baking soda (If none readily avail in your pantry, you can simply use baking powder. Conversion as follows: x 3 of soda so in this case 3 teaspoons and omit the salt since the substitution of the powder may affect the flavor)
  • Coarse salt pinch (use if going with baking soda and again omit if using baking powder)
  • 2/3 cup non-fat milk
  • 2/3 cup plain low-fat yogurt
  • 2 large eggs
  • 1 orange, zested and juiced
  • 1 cup fresh, frozen or dried cranberries (I used dry again for convenience-sake!)
  • 1/2 cup slice almonds (or chopped almonds whichever is easier!)

Directions:

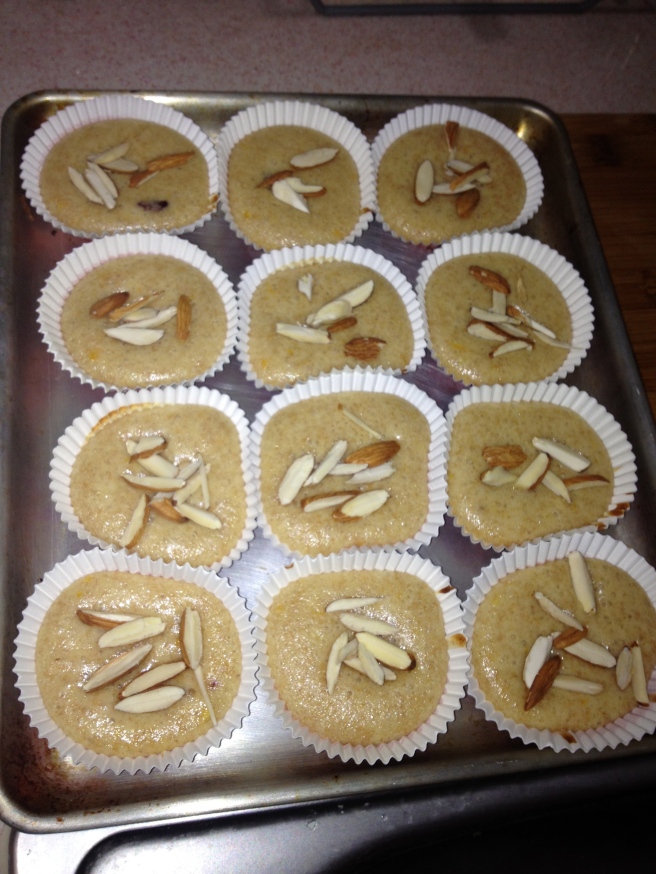
  1. Preheat oven to 350 degrees F (i.e. around 177 degrees C). Line your muffin tins with baking cups (or in my case since I don’t yet have a muffin tray I just overlapped 5 baking cups and baked on normal tray).
  2. Whisk together sugar, flours, baking soda and salt (or 3 teaspoons baking powder only) in a large bowl.
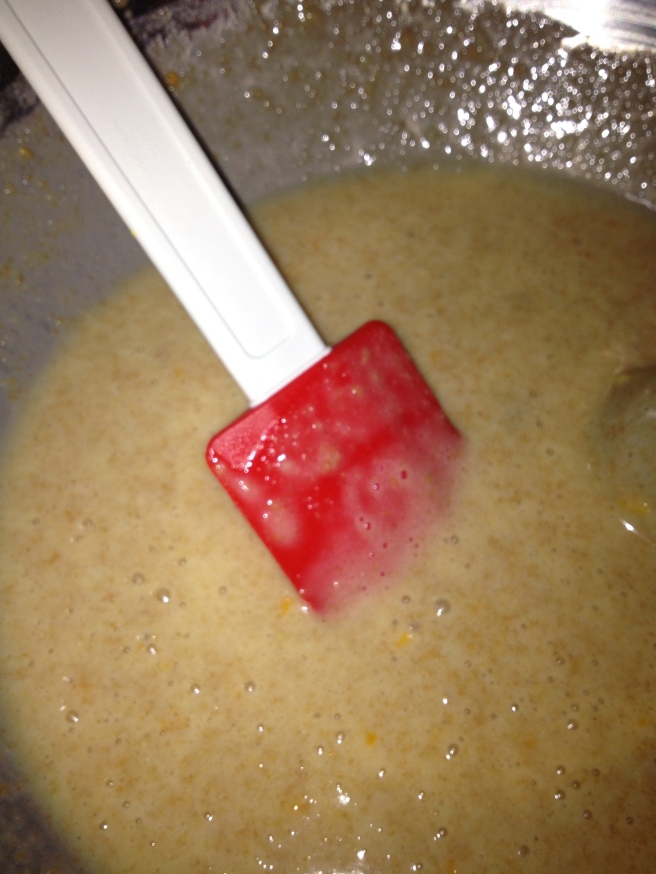
  3. In a separate bowl, whisk together milk, yogurt, eggs and orange zest and juice.
  4. Fold liquid mixture into flour mixture, then gently fold in cranberries until combined.
  5. Spoon batter into baking cups until each is around 3/4 full. Sprinkle with almonds (can use any other sprinkles you want really!)
  6. Bake for around 20 minutes. Test with toothpick and insert to ensure the center of each one comes out clean. Then transfer pans to wire racks and let cool for 10 minutes. Turn our muffins onto racks and let cool completely or keep in wrapper. Up to you!

Savoiardi: fingers has never tasted this good….

Image

So the quest for Italian cookies continue! I love anything flavorful yet healthy and these savoiardi cookies hit just the right spot! These yummy biscuits are know typically in America as lady fingers and most commonly used for tiramisu recipes although I think these freshly baked homemade biscuits are absolutely good to go!

This is a delicious simple recipe with ingredients that you probably already have in your pantry. I whipped this up in literally 10 – 15 minutes and I can already smell the warm sweetness of the biscuit in the kitchen!

Image

As there’s limited space for a convention oven and most of us here in Hong Kong are equipped with the next choice, aka a toaster oven, I found that this recipe works perfectly fine. Some adjustments to note is that heat may be distributed less evenly and I found that with my oven, the back burned faster so I rotated 5 – 7 minutes into baking. Always a good thing to continue to monitor your first batch to see which heat and time works best with your particular oven! Another caution to take is that these smaller ovens will induce heat closer to the cookies and will cause higher tendencies the burn so I bake them until they harden and put a layer of aluminum foil on top to avoid burning the tops of these delicate cookies (Thanks mom!).

Image

SAVOIARDI RECIPE (source: www.allrecipes.com)

This recipe makes 24 cookies
Note: This simple recipe is tested fool-proof! I whipped the egg yolk only somewhat consistently and egg whites sometimes with softer peaks, sometimes stiffer peaks and result is still a soft spongecake biscuit!

Ingredients:

  • 4 eggs
  • 2/3 cup white sugar
  • 1 teaspoon vanilla extract
  • 1/8 teaspoon salt
  • 3/4 cup all-purpose flour

Directions:

  • Preheat oven to 375 F (190 C). Line three jelly roll pans (or any flat baking pan) with parchment paper. Prepare a pastry bag with a size 6 (1/2 inch tip). Note: I’m more of an economical baker so I always substitute with a large ziplock bag with a 1/2 inch tip cut!
  • Separate the eggs. Whisk the egg yolks with 1/2 of the sugar and all of the vanilla. Beat until very light colored (Can use mixer for a couple minutes or by hand for around 5 minutes- I got a good workout from this!)
  • In a clean bowl beat the egg whites until they hold soft peaks. While beating, slowly add the salt and the remaining sugar until combined. Gently fold the beaten egg whites into the egg yolk mixture.
  • Sift the flour over the egg mixture and gently fold it in.
  • Fill the pastry bag with half of the batter and pipe 3 1/2 inch fingers, 1 1/2 inches apart, in rows on the parchment paper. Continue with the second half of the batter in the same manner. Note: Feel free to sift powder/icing sugar on top of these prior to baking for an added touch of sweetness!
  • Bake for around 15 minutes until firm to touch and golden. Remove fingers from baking sheet and place on racks to cool.

After cooling, there’s 2 choices: EAT ALL IMMEDIATELY or store these lovely fingers in an airtight container between layers of wax paper. They also freeze well.

Hello….meet Biscotti. Butterless goodness. Need I say more?

Image

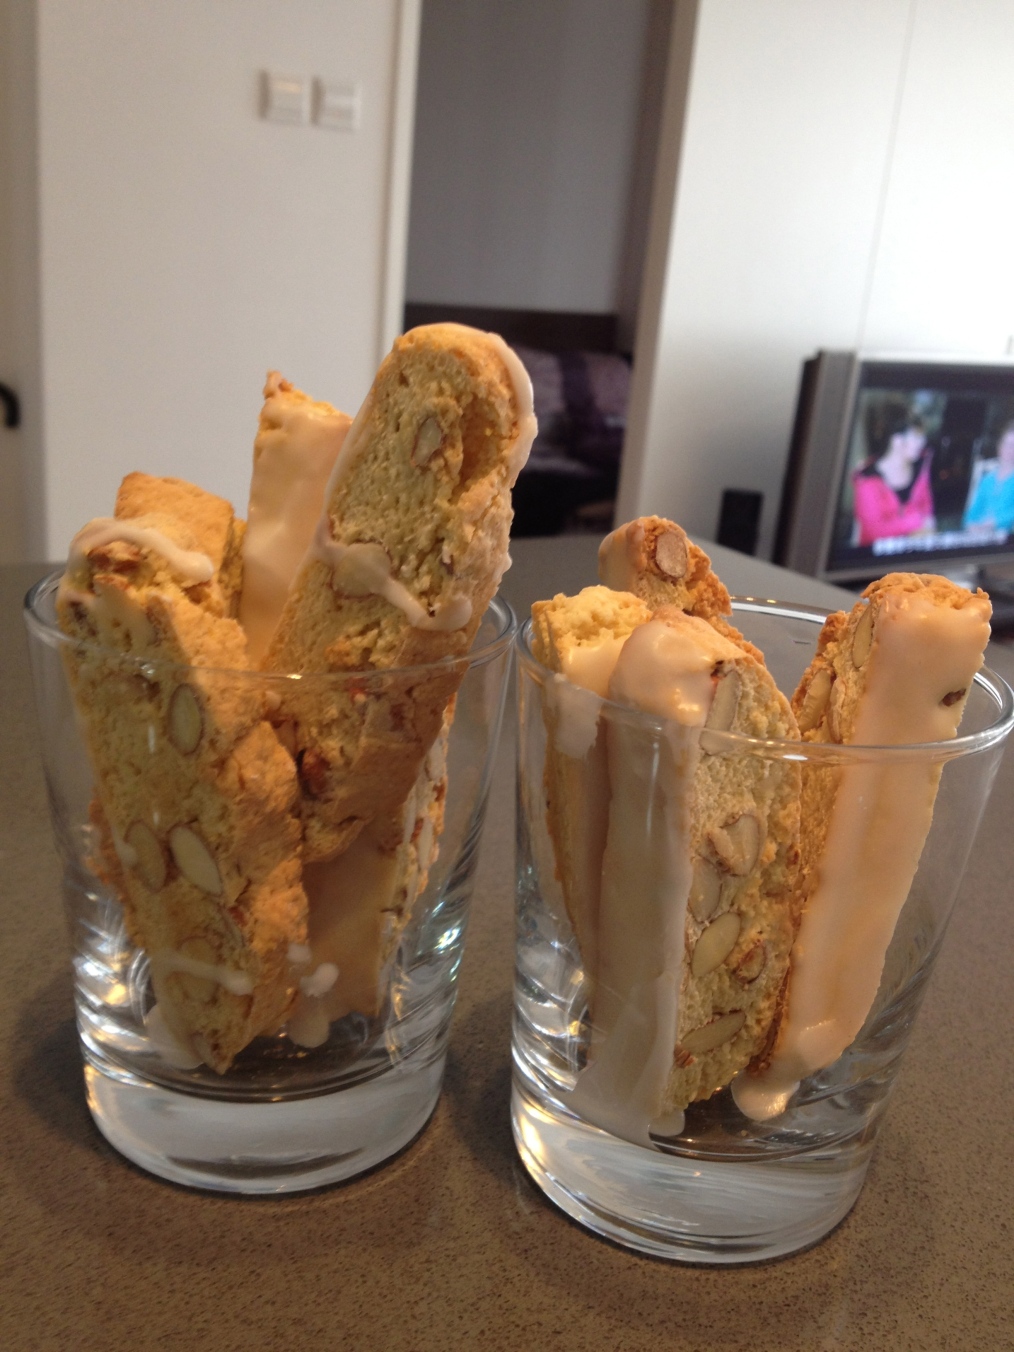
Whenever I think cookies, I think only of buttery goodness and sweet sweet sugar. It always seemed more of a treat and guilty pleasure than a healthy snack. After a bit of research, I stumbled across the biscotti and it was the perfect platform to dip my feet in baking in Hong Kong. I’m insanely addicted to all things nuts (ahem*) and the sweetness of fruits with the crunchy texture of nuts is just a match made in heaven! I’m by no means an advanced baker so I like recipes that are simple and fool-proof to follow. For my first batch, I opted with a Lemon Pistachio Biscotti recipe (source: http://www.best-cookie-collection.com).

I love how this cookie has so much texture and taste from the double-baking. A plus that there is no butter or extra fats except the eggs and for fans of a big crunch, you just need to bake it slightly longer and for fans of a chewier texture, you simply need to add a bit of butter to the recipe. The amount of sugar can be adjusted to your taste (I like more sugar with a plain biscotti or less if I intend on making a icing drizzle- recipe at the bottom of page).

Image

You can really play with this recipe and use any nuts you adore (almonds, hazelnuts…), fruit combinations (apricots…), add in your favorite drinks (expresso, matcha) AND for the alcoholic in some of us, twist it up for an adults version (my current love is with limoncello!). It’s a simple recipe and hard to go wrong and works perfectly baked in a toaster oven.

Lovely dipped in coffee or liqueur of your choice, biscotti’s’ are excellent and healthy choice for AM or PM!

ENJOY!

LEMON PISTACHIO BISCOTTI RECIPE

Recipe yields around 48 biscottis and they last for 1 – 2 weeks in an airtight sealed container.

Ingredients:

– 2 1/4 cups flour
– 1 cup sugar
– 2 teaspoon finely grated lemon zest
– 1 1/2 teaspoons baking powder
– 1 1/2 teaspoons salt
– 1 cup unsalted pistachio nuts un-chopped (can substitute with any nut of your choice! Just make sure it is unsalted)
– 2 large eggs
– 1 egg yolk from large egg
– 1 tablespoon lemon juice (can opt for limoncello for the adult version. I prefer to add a shot and don’t worry it won’t be very strong!)
– 1 teaspoon vanilla (can substitute with almond extract)

Directions:

  1. Preheat oven to 325 degrees F (i.e around 162 degrees C). Line a baking sheet with parchment paper or nonstick baking liner.
  2. In a large bowl combine (either mixer or by hand) flour, sugar, lemon zest, baking powder and salt until well blended.
  3. Add the nuts (slow speed on mixer or by hand).
  4. In a small bowl, lightly beat the eggs, egg yolk, lemon juice, and vanilla with a whisk.
  5. Slowly pour in egg mixture to the flour mixture (slow speed on mixer or by hand).
  6. Continue stirring until the dough is well blended and begins to form moist clumps (takes around 2 minutes).
  7. Scrape the dough onto an un-floured clean surface. Lightly dust your hands with flour and knead the dough briefly. Shape the dough into 2 equal sections.
  8. Shape each section into a 2 inch by 10 inch log. Beware that the dough will be sticky so you may need to add more flour to your hands as you go.
  9. Transfer the logs onto your prepared baking sheet, spacing them a couple inches apart.
  10. Bake for around 40 minutes or until the top of the logs are cracked and the dough inside the cracks no longer look wet.
  11. Take out of oven and place baking sheet to cool for around 15 minutes.
  12. Using a serrated knife, cut the logs on a slight diagonal into 1/2 inch slices. Use a gentle sawing motion to cut through the top crust.
  13. Place the slices back onto the baking sheet cut side down and this time no need to space the since they will no longer spread.
  14. Bake the biscotti again at same heat for another 10 – 20 minutes or until they are dried to your taste. Less if you want more chewy and more if you like the big crunch.
  15. Place baking sheet to cool.

Image

SIMPLE LEMON ICING

Ingredients:
– 2 cups sifted powdered sugar
– 1 teaspoon grated lemon zest
– 1/4 cup lemon juice (or you can spike it again by replacing with limoncello!)

To make the icing, simply combine all the above ingredients in a small bowl and beat until smooth. You can drizzle over the biscotti or dip one end of it or coat the flat bottom of the cookie and let dry. For this simple icing, feel free to change it up with other flavors, like using orange zest or other juices/ liqueurs to your liking!

Experimenting with this versatile recipe is the best part! Ahhh….loving simplistic recipes!